Text to Video AI tool for Beginners : Imagine describing a scene from your imagination—a sunset over a neon cityscape, a dragon soaring through misty mountains, a cozy café where rain patters against the window—and watching it come to life as moving video within minutes. This is no longer science fiction but accessible reality thanks to text-to-video artificial intelligence. For complete beginners, this technology represents a magical doorway into visual storytelling without requiring cameras, actors, sets, or technical expertise. This comprehensive guide will walk you through every aspect of getting started with text-to-video AI, transforming you from curious observer to confident creator in the most exciting creative revolution since the invention of the camera.
Section 1: Understanding the Magic – What Actually Happens When You Type
The Translation Process Simplified
When you type a description into a text-to-video AI tool, a fascinating multi-step translation occurs:
- Understanding Your Words: The AI analyzes your text to identify key elements: subjects (who/what), actions (what’s happening), settings (where), emotions (how it feels), and style (how it looks).
- Finding Visual References: Drawing from its training on millions of videos and images, the AI identifies visual patterns associated with your words. “Cozy café” might reference warm lighting, wooden furniture, and steam rising from cups based on thousands of café scenes it has studied.
- Creating Frames: The system generates a sequence of images that match your description. Crucially, it ensures these images flow naturally from one to the next—a process called “temporal coherence” that separates video generation from simply stringing together still images.
- Adding Motion: Objects move, cameras pan, lights change—all based on your description and the AI’s understanding of how things typically move in the real world (or in artistic styles).
What Beginners Often Misunderstand
- It’s not searching for existing videos: The AI creates new content, not finding and editing together clips from its training data.
- It’s not perfect physics: While improving rapidly, AI doesn’t truly understand physics like humans do. It’s mimicking patterns it has seen, which sometimes leads to unusual motion.
- It’s collaborative, not autonomous: You’re not ordering a robot to make a video; you’re collaborating with a creative partner that interprets your ideas through its unique perspective.
See More : AI Video Maker for Instagram Reels and Shorts
Section 2: Choosing Your First Tool – Finding the Right Starting Point
Criteria for Beginner-Friendly Platforms
When selecting your first text-to-video tool, prioritize these characteristics:
1. Intuitive Interface: Look for clean, uncluttered layouts with obvious buttons and minimal technical jargon. The learning curve should be about creativity, not navigation.
2. Free Tier or Trial: Begin with platforms offering substantial free access so you can experiment without financial pressure. Many quality tools offer free generations with watermarks or shorter durations.
3. Helpful Examples and Tutorials: The best beginner platforms showcase what’s possible through examples and provide step-by-step guidance.
4. Supportive Community: Platforms with active user communities where you can see others’ creations and learn from their prompts accelerate your learning dramatically.
Recommended Starting Points for 2024 Beginners
Pika Labs: Particularly beginner-friendly with its conversational approach. The interface feels like chatting with a creative friend who happens to be a visual genius. Its free tier offers enough generations to learn the basics.
RunwayML (Free Tier): While its professional features are paid, the free version provides an excellent introduction with clear examples and an intuitive interface. Its “What You See Is What You Get” approach helps beginners understand cause and effect in prompting.
Stable Video Diffusion (through user-friendly interfaces like Clipdrop): While the underlying technology is complex, several websites provide simplified access. These often offer completely free trials perfect for experimentation.
Canva’s New AI Video Features: If you’re already familiar with Canva for design, their gradual integration of AI video tools provides a comfortable, familiar environment to start exploring.
Avoid Initially:
- Platforms requiring technical knowledge of machine learning
- Tools with confusing parameter adjustments
- Systems marketed primarily to professionals
- Anything requiring immediate payment before trying
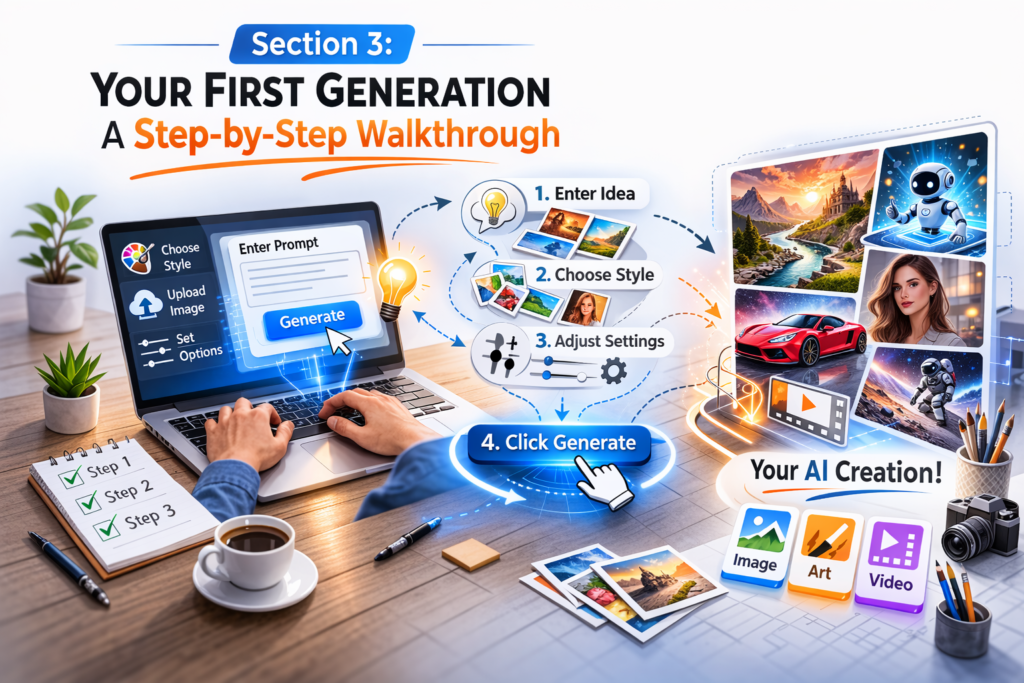
Section 3: Your First Generation – A Step-by-Step Walkthrough
Preparation: Setting Realistic Expectations
Before typing your first prompt, understand that:
- Your first attempts will likely be imperfect—this is normal
- AI interpretation can be surprising—view this as creative inspiration rather than failure
- Short, simple prompts often work better initially than long, detailed ones
- The process is iterative—you’ll refine based on results
Step 1: Start Simple
Begin with a basic scene: “A cat sleeping in a sunbeam.”
Step 2: Observe the Results
Your first generation might show:
- A recognizable cat (though possibly with extra toes or unusual proportions)
- Something resembling sunlight
- Motion (perhaps the cat breathing or dust motes floating)
Step 3: Analyze What Worked and What Didn’t
- Did the cat look like a cat?
- Was the sunlight convincing?
- Did the motion feel natural?
- What elements surprised you?
Step 4: Refine Your Approach
Based on your observations, try: “Fluffy orange cat sleeping peacefully in a warm sunbeam, gentle breathing motion, dust particles floating in light.”
Notice how adding specific details (“fluffy orange,” “gentle breathing,” “dust particles”) gives the AI more to work with while maintaining simplicity.
Step 5: Experiment with Variations
Most platforms offer “variation” buttons. Generate several versions of your successful prompt to see the range of interpretations. This teaches you about the AI’s creative flexibility.
Section 4: The Art of Prompting – Speaking the AI’s Language ( Text to Video AI tool for Beginners )
Prompt Structure for Beginners
Think of your prompt as having three parts:
1. The Main Subject: Who or what is the focus? (Be specific: “an elderly wizard” not just “a person”)
2. The Action and Setting: What’s happening and where? (“mixing potions in a cluttered laboratory”)
3. The Style and Mood: How should it look and feel? (“fantasy illustration style, mysterious mood, dramatic lighting”)
Put together: “An elderly wizard with a long beard mixing glowing potions in a cluttered laboratory, fantasy illustration style, mysterious mood, dramatic lighting from a single candle.”
Essential Prompting Techniques for Beginners
Be Specific but Not Overly Technical:
- Instead of: “Person walking”
- Try: “A woman in a red coat walking her dog in autumn park”
- Instead of: “Building exterior”
- Try: “Victorian townhouse with peeling paint and flower boxes”
Use Familiar References:
The AI understands comparisons to familiar things:
- “Looks like a Studio Ghibli film”
- “In the style of 1980s fantasy movie posters”
- “Photorealistic like National Geographic photography”
One Emotion at a Time:
While professionals blend emotions, beginners should start with single emotions:
- “Joyful celebration”
- “Peaceful meditation”
- “Suspenseful discovery”
Common Beginner Prompting Mistakes to Avoid
1. The Kitchen Sink Approach: “A beautiful sunset over mountains with a lake reflecting colors while birds fly and a deer drinks and flowers bloom…” Too many elements confuse the AI. Start with 2-3 key elements.
2. Abstract Concepts Without Concrete Anchors: “The feeling of nostalgia” is too abstract. Instead: “An old toy chest in an attic, sunlight through dust, gentle music box melody—evoking nostalgia.”
3. Contradictory Instructions: “Brightly lit dark scene” or “fast slow motion” confuse the AI. Choose one direction.
4. Expecting Photographic Perfection: Early attempts will have imperfections. Embrace the artistic quality rather than demanding realism.
Section 5: Understanding AI Limitations – Working With, Not Against, the Technology
Current Technical Limitations (And How to Work Around Them)
1. Short Duration: Most beginner tools generate 3-4 second clips.
- Workaround: Think in moments rather than stories. Create emotional or impactful snippets.
- Creative approach: Several short clips can be edited together to suggest longer narratives.
2. Inconsistent Characters: Characters may change appearance between shots.
- Workaround: Focus on scenes where character consistency matters less (landscapes, objects, crowds).
- Creative approach: If characters change, frame it as dream sequences, transformations, or stylistic choice.
3. Physics Quirks: Objects may float, scale may shift, motion may be unnatural.
- Workaround: Use these quirks for surreal or dreamlike content.
- Creative approach: Add text like “dream sequence” or “memory” to contextualize imperfections.
4. Detail Limitations: Fine details like text, facial features, or intricate patterns may blur.
- Workaround: Focus on medium shots rather than extreme close-ups.
- Creative approach: Use impressionistic style prompts that don’t demand fine detail.
The Beginner’s Advantage
Ironically, beginners sometimes create more interesting content because they don’t know what’s “supposed” to be difficult. An experienced filmmaker might avoid complex crowd scenes knowing they’re challenging, while a beginner might prompt “thousands of paper cranes flying through Tokyo streets at night” and create something magically unexpected.
Section 6: Building Your Skills – A 30-Day Learning Path
Week 1: Exploration and Play
Goal: Overcome the blank page anxiety and generate your first 20 videos.
Daily Practice:
- Day 1-2: Generate 5 videos of simple objects (apple on table, candle flame, waving flag)
- Day 3-4: Experiment with different styles (cartoon, painting, photograph, sketch)
- Day 5-7: Try emotions (joyful, mysterious, peaceful, exciting scenes)
Key Learning: How small changes in wording affect results.
Week 2: Developing Consistency
Goal: Create multiple videos that feel like they belong together.
Daily Practice:
- Create a “character” and generate them in different situations
- Develop a consistent visual style across different subjects
- Experiment with camera movements (zoom in, pan across, rotating view)
Key Learning: How to maintain visual coherence.
Week 3: Simple Storytelling
Goal: Create sequences that suggest narratives.
Daily Practice:
- Create “before and after” pairs
- Show cause and effect (seed growing, match lighting candle)
- Suggest relationships between elements
Key Learning: How to imply narrative through visual sequencing.
Week 4: Personal Projects
Goal: Complete a small project from concept to finished video.
Project Ideas:
- A 15-second mood piece for a song you love
- A visual poem in three parts
- An advertisement for an imaginary product
- A book scene brought to visual life
Key Learning: The complete creative process from idea to execution.
Section 7: Creative Applications for Beginners
Personal and Recreational Uses
Visual Journaling: Transform written diary entries into visual representations. The process of converting experiences into prompts itself becomes a reflective practice.
Dream Recording: Capture the visual essence of dreams. Even imperfect representations can help recall and analyze dream content.
Greeting Cards and Personal Messages: Create unique animated greetings for birthdays, holidays, or special occasions.
Visual Brainstorming: Generate visual representations of ideas for home decor, garden plans, or craft projects.
Educational and Learning Applications
Concept Visualization: If you’re learning something new—historical events, scientific processes, literary scenes—create visual aids to enhance understanding.
Language Learning: Generate scenes that incorporate vocabulary you’re trying to learn, creating visual mnemonics.
Creative Writing Companion: Visualize scenes from stories you’re writing to better describe them or overcome writer’s block.
Social Media and Personal Branding
Unique Profile Content: Create eye-catching banner videos or profile animations that reflect your personality or brand.
Post Enhancement: Add custom animations to accompany your social media posts rather than using stock content.
Storytelling: Share personal stories or experiences through generated visuals rather than just text or photos.
Hobby Enhancement
Role-Playing Game Enhancement: Create visuals for game scenarios, characters, or locations.
Book Club Enhancement: Generate visual interpretations of book scenes to spark discussion.
Music Visualization: Create visual companions for favorite songs or compositions.
Section 8: Overcoming Common Beginner Challenges
Challenge 1: “I Don’t Know What to Create”
Solution: Use prompt generators or idea lists initially. Many platforms offer “inspiration” features. Alternatively:
- Look around your room and describe something you see
- Open a book to a random page and visualize a sentence
- Listen to a song and describe the imagery it evokes
- Recall a recent dream or memory
Challenge 2: “My Results Don’t Match My Imagination”
Solution: This is actually the creative opportunity. Instead of forcing the AI to match your exact mental image:
- Embrace the AI’s interpretation as creative collaboration
- Use surprising elements as inspiration for new directions
- Remember that audiences will see the final product, not your mental comparison
Challenge 3: “I’m Overwhelmed by Technical Terms”
Solution: Ignore advanced parameters initially. Most platforms have “basic” or “simple” modes. The technical terms (CFG scale, sampling steps, etc.) are for fine-tuning once you understand the basics. You can create wonderful content without ever touching these settings.
Challenge 4: “I Feel Uncreative”
Solution: Creativity is a muscle. Start with these exercises:
- The Element Change: Take a successful prompt and change one element
- The Style Transfer: Take a simple scene and try it in ten different styles
- The Combination Game: Combine two unrelated things (“tea party on Mars,” “library in a treehouse”)
- The Emotional Shift: Take a neutral scene and generate happy, sad, and mysterious versions
Section 9: Ethical Considerations for New Creators
Developing Responsible Habits Early
As a beginner, establishing ethical practices from the start creates a strong foundation:
1. Honesty About AI Involvement:
- When sharing AI-generated content, consider if context requires disclosure
- Don’t present AI creations as hand-made or traditionally filmed
- When in doubt, a simple “AI-assisted” or “AI-generated” is appropriate
2. Respecting Intellectual Property:
- Avoid prompting specific copyrighted characters or scenes
- Don’t generate content that could be mistaken for someone else’s work
- Remember that while AI creates new images, it’s trained on existing work
3. Considering Content Impact:
- Avoid generating harmful, misleading, or sensitive content
- Consider how different viewers might interpret your creations
- Remember that once shared, you can’t control how content is used or interpreted
4. Managing Expectations:
- Help others understand what AI video generation can and cannot do
- Don’t contribute to hype that sets unrealistic expectations
- Share both successes and interesting failures to demystify the technology
Section 10: Community and Learning Resources
Finding Your Creative Community
Platform Communities: Most tools have Discord servers, forums, or social media groups where users share creations and tips. These are invaluable for beginners.
Social Media Hashtags: Follow #AIVideo, #TextToVideo, #AIAnimation to see what others are creating and learn from their approaches.
YouTube Tutorials: Search for “[Your Platform Name] beginner tutorial” to find visual walkthroughs.
Learning Through Observation
When you see a creation you admire:
- Analyze the prompt (if shared): What made it effective?
- Notice what elements consistently appear in quality generations
- Observe the balance between specificity and creative freedom
- See how creators work with rather than against AI tendencies
Creating a Personal Learning Library
As you experiment:
- Save successful prompts with notes on why they worked
- Keep a “failure” journal of what didn’t work and possible reasons
- Collect inspiring examples from others with analysis of their strengths
- Document your progress with dated examples to see your improvement
Section 11: Moving Beyond Basics – Gradual Skill Development
When You’re Ready to Level Up
Signs You’re Ready for Intermediate Skills:
- You regularly create content you’re happy with
- You understand why certain prompts work and others don’t
- You’ve developed a personal style or preferred subjects
- You’re curious about the “why” behind the results
Intermediate Skills to Explore:
1. Prompt Chaining: Creating a series of connected videos that tell a longer story.
2. Style Development: Consistently creating content with recognizable visual signatures.
3. Hybrid Techniques: Combining AI generation with simple editing, sound addition, or text overlays.
4. Advanced Platform Features: Exploring settings you previously ignored once you understand their purposes.
5. Creative Constraints: Setting limitations (single color palettes, specific camera angles, time limits) to enhance creativity.
The Journey Mindset
Remember that every professional was once a beginner. The AI video landscape evolves rapidly, so everyone is learning simultaneously. Your fresh perspective as a beginner is valuable—you see possibilities that veterans might overlook.
Section 12: Your First Project – From Concept to Completion
A Guided First Project: “A Day in an Imaginary City”
Step 1: Concept Development
Choose a city theme: Steampunk metropolis, underwater civilization, floating sky city, or forest tree city.
Step 2: Breaking Into Scenes
Divide into 4-5 short scenes:
- Sunrise/morning establishing shot
- Midday activity scene
- Evening transition
- Night atmosphere
Step 3: Prompt Writing for Each Scene
For each scene, write 3 versions: simple, detailed, and stylized.
Step 4: Generation and Selection
Generate each, select favorites, note what worked.
Step 5: Assembly and Enhancement
Use free editing software (CapCut, DaVinci Resolve free version, iMovie) to:
- Arrange clips in order
- Add transitions
- Include simple text titles
- Add royalty-free music
Step 6: Reflection and Learning
After completion, ask:
- What was easier than expected?
- What was more challenging?
- What would I do differently next time?
- What did I learn about my creative process?
Conclusion: The Beginning of Your Visual Storytelling Journey
Text-to-video AI for beginners represents more than a new tool—it’s a new form of literacy, a new language for visual expression, and a new way of interacting with your own imagination. The blank text box awaiting your description is a portal to visual worlds limited only by your willingness to experiment, learn, and create.
Your journey will have moments of frustration when the AI interprets your words unexpectedly, and moments of wonder when it creates something more beautiful than you imagined. Both are valuable parts of the creative process. The “mistakes” often lead to creative breakthroughs, and the “failures” teach more than easy successes.
As you begin, remember that every professional creator working with this technology is also learning. The field is too new for anyone to be a true expert. Your perspective as a beginner—unburdened by assumptions about what’s possible or difficult—is actually an advantage. You might combine elements in ways an experienced filmmaker would dismiss as impractical, creating fresh, innovative content.
Start today. Type one sentence. See what happens. Then type another. Each generation teaches you something about the AI, about visual language, and about your own creative voice. The technology will continue evolving, but your journey as a creator begins with that first prompt, that first moment of watching words transform into motion, that first step into the expansive world of AI-powered visual storytelling.
The future of visual creation is being written—and visualized—by creators like you who are willing to explore this new frontier. Your unique perspective, your personal stories, your imaginative visions now have a direct pathway to visual reality. What will you create first?